
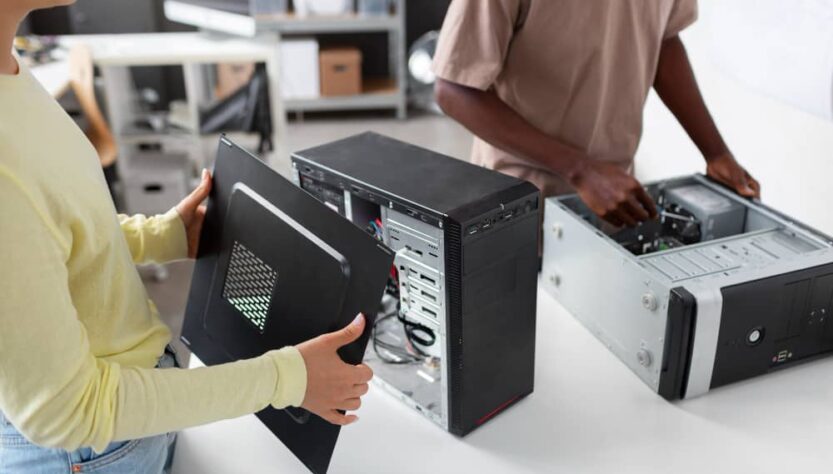
A home media server is built by combining a reliable computer, enough storage, a server-friendly operating system, fixed network addressing, and media software such as Plex or Jellyfin. The practical setup is to install the operating system from a bootable USB drive, reserve the machine’s IP address in the router, enable secure remote administration, mount the media storage, and then configure the streaming service.
The machine does not need to be a rack server or an expensive workstation. A retired desktop, a compact office PC, a small-form-factor system, or a purpose-built storage box can all perform the job, provided the hardware matches the expected workload. The difficult part is rarely the first power-on. It is making a few sensible design decisions before installation, especially around storage capacity, transcoding, backups, network access, and whether virtualization is genuinely useful.
Once the initial configuration is complete, the server can run without a monitor or keyboard. You manage it from another computer through SSH, Remote Desktop, a browser-based dashboard, or a VPN-protected web interface. The guide below explains the complete home media server setup without assuming previous Linux or server administration experience, so continue with the hardware checklist before downloading any installation image.
Key takeaways:
- A reused desktop or mini PC is sufficient when its CPU, storage, cooling, and network connection match the intended media workload.
- Most first-time installations are easiest with a monitor, keyboard, bootable USB drive, and wired Ethernet connection.
- A router-level DHCP reservation gives the server a predictable local IP address without creating an avoidable address conflict.
- RAID improves availability after a disk failure, but only a separate backup protects media and configuration data from deletion, corruption, or theft.
What is a home media server, and what should it do?
A home media server is a computer whose main job is to store, organize, and deliver video, music, photos, and related files to other devices on the network. The server runs continuously or on demand, while televisions, phones, tablets, streaming boxes, game consoles, and laptops act as clients.
The simplest version is a shared folder containing media files. A more capable design adds a library application that identifies titles, downloads artwork and metadata, remembers playback position, manages user profiles, and converts files when a client cannot play the original format. That conversion process is called transcoding, and it is the workload most likely to determine whether an old processor is adequate or frustratingly slow.
Direct playback is much lighter. When the client supports the file’s codec, resolution, audio format, and container, the server mainly reads data from storage and sends it across the network. A modest four-core office PC can handle several direct streams, while real-time 4K transcoding may require a recent integrated GPU or a supported discrete graphics card.
Making a home media server also creates a foundation for other self-hosted services. These should be added gradually, not all at once:
- centralized file storage and private cloud access;
- automatic backups for household computers and phones;
- development environments, test websites, and databases;
- home automation through platforms such as Home Assistant;
- private game servers for selected multiplayer titles;
- containers, virtual machines, and local AI tools such as Ollama;
- network monitoring, ad filtering, and secure remote access.
In my experience as a developer, the most reliable first server is deliberately boring: one stable operating system, one storage layout, one media application, documented passwords, and a backup that has already been tested.
Read more on: What Is a Home Server? A Beginner’s Complete Guide
What hardware do you actually need for building a home media server?
You need a stable CPU, enough RAM for the chosen software, reliable storage, a Gigabit Ethernet interface, adequate cooling, and a power supply sized for the installed drives. The correct specification depends less on the word “server” and more on how many users will stream simultaneously and whether their devices can direct-play the files.
A system such as an HP EliteDesk with a sixth-generation Core i5, 8 GB of RAM, and a 500 GB hard drive can be a useful learning platform. It can serve files, run one media application, host a few lightweight containers, and direct-stream common formats. Its limitations become visible when several users request transcoding, storage needs grow beyond the available drive bays, or virtualization consumes a large share of the memory.
| Build profile | Practical starting point | Best suited to | Main limitation |
|---|---|---|---|
| Reused desktop | Four-core CPU, 8 GB RAM, small SSD for the OS, one or more HDDs, 1 GbE | Learning, file sharing, direct streaming, light containers | Power use, limited drive bays, older codec support |
| Compact media server | Modern low-power CPU with integrated graphics, 16 GB RAM, NVMe SSD, external or network storage | Quiet operation, hardware transcoding, several services | Few internal disks and limited expansion |
| Storage-focused tower | Six-core or better CPU, 16 to 32 GB RAM, SSD boot drive, multiple NAS-rated HDDs, case with several bays | Large libraries, redundancy, backups, long-term expansion | Higher purchase cost, size, heat, and noise |
| Virtualization host | Six or more CPU cores, 32 GB RAM, fast SSD storage, separate media disks, 1 or 2.5 GbE | Proxmox, several VMs, laboratories, isolated services | More administration and greater recovery complexity |
For storage, use an SSD for the operating system, application databases, thumbnails, and container data. Store the bulk media library on hard drives because their cost per terabyte is lower. An all-SSD server is quieter and faster, but it is rarely the most economical choice for a large movie archive.
Physical design matters. A case that accepts many 3.5-inch drives can grow for years, while a tiny PC may require a USB enclosure or a separate NAS. Check the number of SATA ports, available PCIe slots, drive cooling, idle power consumption, and whether the power supply provides enough connectors before buying disks.
Use wired Ethernet whenever possible. One Gigabit Ethernet delivers enough real throughput for multiple high-bitrate streams in most homes. A 2.5 GbE connection becomes valuable when several clients copy large files, the server edits media directly over the network, or backups routinely move hundreds of gigabytes.
Which operating system should you choose for a home media server setup?
Choose Ubuntu Server or Debian for a straightforward Linux installation, TrueNAS SCALE or Unraid for storage-centered management, Windows when Microsoft familiarity is the priority, and Proxmox VE only when you genuinely need multiple virtual machines. The best option is the one you can update, recover, and troubleshoot without turning every routine task into a research project.
| Platform | Strengths | Trade-offs | Recommended user |
|---|---|---|---|
| Ubuntu Server | Large community, extensive documentation, broad Docker support, simple package management | Command-line administration is required for many tasks | Beginners willing to learn Linux |
| Debian | Stable, lean, predictable, suitable for long-lived services | Some packages may be less recent than in faster-moving distributions | Users who value stability over novelty |
| TrueNAS SCALE | Strong storage management, snapshots, ZFS, browser interface, application support | Storage planning should be completed before data is imported | Users building a NAS-first media server |
| Unraid | Flexible disk sizes, approachable interface, convenient containers and virtual machines | Paid license and a storage model different from conventional RAID | Home users prioritizing convenience and expansion |
| Windows | Familiar desktop tools, simple file sharing, native support for many commercial applications | Containers usually rely on Docker Desktop or WSL, and consumer editions have remote-access limitations | Users who prefer Windows administration |
| Proxmox VE | VM isolation, snapshots, containers, browser management, flexible laboratories | Adds a virtualization layer, resource allocation decisions, and extra recovery steps | Users running several isolated operating systems |
For a first server with 8 GB of RAM and one media workload, a direct Ubuntu Server installation is usually more sensible than a hypervisor. Proxmox becomes compelling when the server has enough memory and CPU capacity to divide resources between multiple guests, such as an Ubuntu media VM, a Home Assistant VM, and an isolated test environment.
Virtualization protects the host from some application failures and makes experiments easier to roll back. It does not remove the need for backups, and it can complicate access to storage devices or integrated graphics used for transcoding. Containers are lighter because they share the host kernel, so Docker is often the better first step when the goal is to run Plex or Jellyfin alongside a few supporting services.
Do you need a monitor for the first boot and installation?
Most beginners should connect a monitor and keyboard for the first installation, then switch to headless management after remote access has been tested. A mouse is optional for text-based Linux installers, although it may be useful when installing Windows or navigating a graphical firmware interface.
The local screen lets you inspect what arrived on a used server, confirm whether Windows is already installed, enter the BIOS or UEFI setup, choose the USB installer as the temporary boot device, and recover quickly if the network configuration is wrong. It removes several unknowns at once. That matters when you do not yet know the server’s IP address, credentials, boot order, or storage layout.
A monitor is not technically mandatory when the hardware provides an out-of-band management controller with remote KVM functionality. Enterprise servers may expose this through technologies such as IPMI, iDRAC, iLO, or another baseboard management controller. After finding the controller’s address in the router, you can open its management interface and control the machine as though a keyboard and screen were physically attached.
Many office desktops and small-form-factor PCs do not include that feature. For those machines, the practical first-boot kit is short:
- a monitor connected through a supported video output;
- a USB keyboard;
- a bootable USB drive containing the chosen operating system;
- an Ethernet cable connected to the home router;
- another computer for downloading images and accessing the router interface.
After installation, Linux servers are normally managed through SSH. Windows Pro and Windows Server can accept Remote Desktop connections after the feature is enabled, while Windows Home does not natively provide the same incoming Remote Desktop host capability. Browser interfaces such as Cockpit, TrueNAS, Unraid, or Proxmox can handle many routine tasks, but command-line access remains valuable when a service fails to start.
How to set up a home server for media streaming, step by step?
The reliable sequence is to inspect the hardware, create a bootable installer, install the operating system, update it, reserve a local IP address, secure remote access, prepare storage, and only then deploy the media application. Following that order prevents application troubleshooting from being mixed with basic network or disk problems.
- Inventory the machine. Record the CPU model, RAM capacity, disk models, network interface, available drive bays, and firmware version, then run basic memory and disk health tests before trusting used hardware with valuable data.
- Decide whether to keep the existing Windows installation. If the server arrived with Windows, boot it once, verify the license and hardware, save any required product key information, and back up files before erasing the disk.
- Download the operating system image. Choose an official ISO for Ubuntu Server, Debian, TrueNAS SCALE, Unraid, Windows, or Proxmox VE, and verify its checksum when the publisher provides one.
- Create the installation USB. Use a tool such as Rufus or Balena Etcher on a second computer, select the correct removable drive, and remember that writing the image deletes everything already stored on that USB device.
- Boot from USB. Connect the installer to the server, power it on, enter the BIOS or UEFI boot menu, select the UEFI USB device, save the change, and restart into the installer.
- Install the operating system to the correct disk. Prefer a dedicated SSD for the OS, create a strong administrator password, use a normal non-root account for daily work, and install the SSH server when the Linux installer offers that option.
- Apply updates immediately. On Ubuntu or Debian, log in and run the package update and upgrade process before installing application software.
- Find the local IP address and create a DHCP reservation. Match the network adapter’s MAC address to the lease shown by the router, then reserve that IP so the server keeps the same address after reboots.
- Test remote access before removing the monitor. Connect from another device over SSH, Remote Desktop, or the platform’s web interface, restart the server once, and confirm that the reserved address still works.
- Prepare storage and deploy the media service. Mount the media disks by a persistent identifier, create clear library folders, assign permissions, and install Plex or Jellyfin only after the storage paths survive a reboot.
For Ubuntu Server, the first update can be performed with:
sudo apt update && sudo apt upgrade -yA DHCP reservation is usually safer for beginners than manually assigning an address inside the operating system. The router remains the central authority for local addressing and can avoid leasing the same address to another device. If you deliberately configure a static address on the server, place it outside the router’s DHCP pool and set the gateway, subnet, and DNS values correctly.
Do not expose SSH directly to the public internet during the initial setup. Use SSH keys instead of password-only authentication, keep the server behind the router’s firewall, and add remote access later through a VPN. Understanding the purpose of each command is more valuable than copying a long terminal script that changes settings you cannot reverse.
How should you design storage, redundancy, and backups?
Separate the operating system from the media disks, choose a redundancy layout that matches the number of drives, and maintain at least one backup that is physically or logically independent from the server. Storage capacity is easy to calculate, but recovery planning is what keeps a failed drive or mistaken deletion from becoming permanent data loss.
A practical directory layout might place movies, television, music, photos, and incoming files under a common mount point such as /srv/media. Application configuration should live elsewhere, for example under /srv/appdata, because configuration databases, watch history, metadata, and custom artwork are often harder to recreate than the application package itself.
- SSD: operating system, containers, virtual machine disks, databases, thumbnails, and frequently accessed application data;
- HDD: large media libraries, local backups, archive files, and content that is read sequentially;
- External drive: detachable backup copy that can be disconnected after the backup finishes;
- Offsite destination: encrypted cloud storage, another trusted location, or a second server outside the home.
| Layout | Minimum disks | Failure tolerance | Suitable use |
|---|---|---|---|
| RAID 0 | 2 | None | Temporary high-speed data where loss is acceptable |
| RAID 1 | 2 | One disk in a mirror | Small, simple, resilient libraries |
| RAID 5 | 3 | One disk | Capacity-efficient arrays where rebuild risk is accepted |
| RAID 6 | 4 | Two disks | Larger arrays that need additional fault tolerance |
RAID is not a backup. It may keep the server running when a drive fails, but it also reproduces accidental deletion, filesystem corruption, ransomware encryption, and application mistakes across the array. Fire, theft, electrical damage, or a failed controller can affect every internal disk at once.
Use the 3-2-1 principle as a target: keep three copies of important data, on two different storage types, with one copy stored offsite. Media that can be re-downloaded may receive a lower backup priority, while family photos, personal videos, documents, server configuration, and encryption keys deserve stronger protection. Schedule backups, monitor their results, and perform a restore test instead of assuming that a completed job is usable.
How do you install Plex or Jellyfin and manage the server remotely?
Install one media platform first, point it at read-only library paths where practical, create user accounts, test direct playback on the local network, and add remote access only after the local service is stable. Plex offers a polished ecosystem and broad client support, while Jellyfin provides an open-source server without tying the core library to a commercial account.
Both applications scan folders, identify content, download metadata, organize libraries, and stream to client devices. The server should not be used as a dumping ground with inconsistent filenames. A predictable structure improves matching accuracy and makes migration easier:
/srv/media/movies/Movie Name (Year)/Movie Name (Year).mkv/srv/media/tv/Series Name/Season 01/Series Name - S01E01.mkv/srv/media/music/Artist/Album/01 - Track Name.flac/srv/media/photos/2026/2026-07 Event Name/
Native packages are appropriate when the server runs one main application and you want the fewest layers. Docker is useful when you plan to add supporting services, keep dependencies isolated, and recreate the environment from a Compose file. A minimal Jellyfin example can look like this:
services:
  jellyfin:
    image: jellyfin/jellyfin
    container_name: jellyfin
    user: "1000:1000"
    network_mode: host
    volumes:
      - /srv/jellyfin/config:/config
      - /srv/jellyfin/cache:/cache
      - /srv/media:/media:ro
    restart: unless-stopped
The numeric user and group identifiers must match an account that can read the media and write to the configuration directories. Hardware transcoding may require passing the integrated GPU device into the container and enabling the matching acceleration method in the application. Do not enable it blindly. Confirm that the CPU or GPU supports the codecs in your library and watch the server’s processor utilization during a test transcode.
For Linux administration, create an SSH key on the client computer, add the public key to the server account, verify that key-based login works, and then disable password authentication if all required administrators have working keys. Tools such as tmux keep terminal sessions alive when the connection drops. Cockpit can provide a browser-based view of system load, storage, services, logs, and updates without replacing the command line.
Remote streaming should not begin with broad port forwarding. A VPN based on WireGuard or another trusted solution lets authorized devices join the home network securely and access the server through its private address. If a media platform’s built-in remote access is used, apply updates promptly, use unique credentials, enable multi-factor authentication where available, and expose only the required service.
How do you keep the server secure, efficient, and ready to expand?
Keep the server maintainable by updating it regularly, limiting exposed services, monitoring hardware health, measuring power use, documenting the configuration, and expanding only when a real workload justifies the added complexity. A home server should reduce friction in daily use, not become an unstable collection of experiments that nobody can recover.
Start with basic operational controls:
- automatic security updates or a documented monthly update routine;
- SMART monitoring and alerts for storage errors;
- CPU temperature, memory, disk usage, and network monitoring;
- a UPS that can trigger a controlled shutdown during a prolonged outage;
- separate administrator and media-user accounts with minimal permissions;
- a written record of IP addresses, storage mounts, services, ports, backup locations, and recovery steps.
From my testing, idle power consumption has a larger effect on the annual operating cost than short bursts of maximum CPU load. A server drawing 70 watts around the clock uses far more energy over a year than a modern mini PC that idles near a fraction of that figure, even when both finish occasional transcoding jobs successfully. Measure at the wall instead of relying on component specifications.
Wake-on-LAN can reduce consumption when the server is needed only for evening streaming or scheduled backups. It is less suitable when phones upload photos throughout the day, home automation depends on the server, or remote users expect continuous access. Drive spindown may save additional energy, although frequent sleep and wake cycles can add latency and may not suit every workload.
Expansion should follow observed bottlenecks. Add RAM when containers or virtual machines swap under normal load. Upgrade networking when file transfers saturate Gigabit Ethernet. Add a supported GPU only when real transcoding sessions overload the CPU. Move to a larger chassis when storage growth becomes predictable, not because empty drive bays look impressive.
A second server can eventually provide offsite replication, failover experiments, or a small cluster. Kubernetes and multi-node container orchestration are valuable learning tools, but they are excessive for a single media application. Proxmox clustering also works best when networking, shared storage, quorum, and recovery behavior are understood before important services depend on it.
Local processing will become increasingly useful as homes add cameras, sensors, automation, and privacy-sensitive applications. A well-designed server can process that data at the edge, reducing latency and dependence on external cloud platforms. Faster broadband and mobile connectivity make remote access easier, but they do not replace authentication, encryption, backups, or careful exposure of services.

