
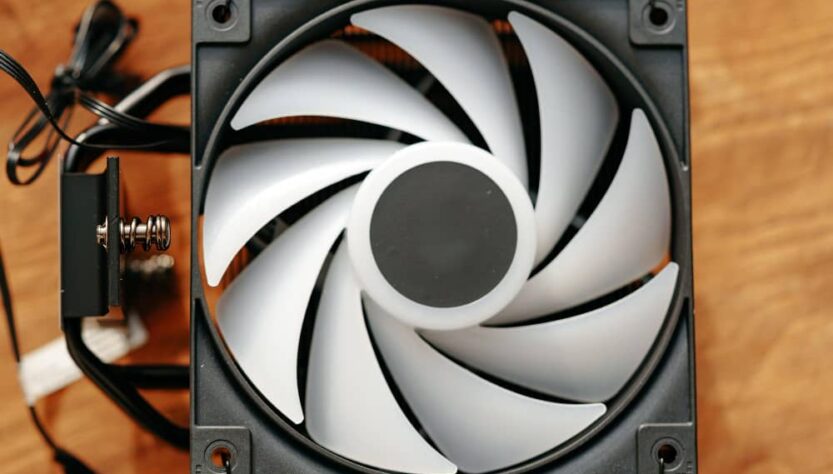
A screaming fan on a mini PC is almost always fixable without opening a support ticket. The two most common culprits are dust clogging the tiny heatsink and vents, and a fan curve that’s set to react too aggressively to normal temperature swings. Because compact mini PCs pack a full CPU, memory, and storage into a case the size of a paperback book, there’s very little room for airflow, which means small problems get loud fast.
Below I’ll walk through five fixes that consistently bring noise levels down on the compact desktops I’ve worked with, from budget-friendly household units to fanless-adjacent industrial boxes that still ship with a single small blower fan. None of these require advanced soldering skills, and most take under fifteen minutes. Keep reading and you’ll have a quieter desk by the end of this guide.
Key takeaways:
- Dust buildup on the heatsink and intake grille is the single most common reason a mini PC fan gets loud over time.
- Dried-out thermal paste forces the CPU to run hotter, which pushes the fan curve into higher, noisier RPM ranges.
- A background process or hidden malware infection can peg the CPU near 100 percent even while the machine sits idle on the desktop.
- Rubber feet, an elevated stand, and better BIOS fan curves can cut perceived noise without touching a single screw inside the case.
What Causes Fan Noise on a Compact Mini PC?
Most fan noise on a mini PC comes down to restricted airflow combined with a fan speed curve that overreacts to minor temperature changes. Unlike a full tower case with multiple 120mm intake and exhaust fans, a mini PC typically relies on one small fan, sometimes as tiny as 40mm or 50mm, to move air through a chassis where components sit only millimeters apart.
That tight layout means dust, a slightly loose screw, or a single cable pressed against the fan blade has a much bigger acoustic impact than it would in a larger case. It also means the thermal margin is smaller, so anything that raises CPU temperature by even a few degrees can trigger a noticeable jump in fan RPM.
How to Reduce Mini PC Fan Noise: 5 Easy Fixes
The fixes below are ordered from the fastest, cheapest solution to the more involved ones. Work through them in sequence rather than jumping straight to a fan replacement, since in most cases the noise disappears after the first two or three steps.
Dust Buildup on the Fan and Heatsink
In a large share of noisy mini PC cases, accumulated dust on the fan blades and heatsink fins is the primary cause of the noise. Dust adds resistance to the blades and blocks the fins that are supposed to transfer heat away from the CPU, so the fan has to spin faster and louder to compensate.
From my testing, a can of compressed air and a soft brush handle this in under ten minutes:
- Power the mini PC down completely and unplug the adapter.
- Remove the bottom or side panel with a small Phillips screwdriver.
- Hold the compressed air canister 6 to 8 inches from the vents and blow dust out in short bursts rather than one long spray, to avoid overspinning the fan.
- Use a soft-bristle brush, such as an unused makeup brush, to gently loosen dust stuck between the fan blades.
- Reassemble the case and test the noise level under both idle and load conditions.
A HEPA-filtered vacuum attachment used from a distance also works well and avoids blowing loosened dust straight back into the case. Repeating this cleaning cycle every three to six months keeps most compact desktops from ever getting loud in the first place.
Loose Screws and Cables Touching the Fan Blade
Loose fan mounting screws and cables resting against the fan blade are a surprisingly common source of rattling and scraping noise in compact chassis, simply because there’s so little space to route wiring cleanly.
Open the case and check whether any SATA, power, or fan cable is touching the blades or the heatsink. Reroute anything that’s making contact and secure it with a small cable tie so it stays clear during operation. While you’re in there, gently wiggle the fan itself; if it shifts or rocks, tighten the mounting screws with a small screwdriver, but stop as soon as they’re snug since overtightening can crack the plastic fan housing.
Dried-Out Thermal Paste
Thermal paste that has dried out or separated loses much of its ability to transfer heat, which raises CPU temperature and forces the fan to run faster than it should. This becomes more likely after two or three years of continuous use, especially in units that run 24/7 as a home server or point-of-sale terminal.
Replacing it involves:
- Disconnecting power and removing the heatsink assembly, usually held by two or four spring-loaded screws.
- Wiping the old paste off both the CPU surface and the heatsink base with a lint-free cloth or isopropyl alcohol.
- Applying a small pea-sized dot of fresh thermal paste to the center of the CPU.
- Reseating the heatsink evenly and tightening the screws in a diagonal pattern to spread pressure equally.
After a repaste, it’s worth monitoring temperatures for a day using a lightweight tool like Core Temp or HWMonitor to confirm the fan settles into a quieter, lower-RPM range at idle.
A Runaway Process or Malware Infection
If the fan roars even when the machine is sitting untouched on the desktop, the likely cause is a background process or malware pulling CPU usage far above normal idle levels. A healthy idle CPU load on most mini PCs should sit somewhere between 5 and 20 percent.
Open Task Manager on Windows with Ctrl+Shift+Esc, or Activity Monitor on macOS, and sort processes by CPU usage. If something unfamiliar is consuming most of the CPU, run a full scan with a trusted antivirus tool such as Windows Defender or Malwarebytes and remove or quarantine anything flagged. In my experience as a developer testing several low-power mini PCs side by side, crypto-mining trojans bundled with pirated software are one of the more frequent causes of a fan that suddenly jumps from a whisper to a wind tunnel with no obvious workload behind it.
An Aggressive Fan Curve or a Worn-Out Fan
Adjusting the fan curve in BIOS or through software is the right first step, and only replacing the physical fan makes sense if the noise persists or has clearly changed character, such as grinding or squealing.
To reach the fan curve settings, restart the PC and press Delete, F2, or the key specified in your manual to enter BIOS, then look for a Hardware Monitor or PC Health Status section. Switching the profile from a fixed high-speed setting to an automatic or custom curve usually lowers noise noticeably during everyday, non-intensive tasks. If your motherboard doesn’t expose enough control, software such as SpeedFan or manufacturer-specific utilities can fill the gap on the software side.
A grinding, squealing, or clicking noise instead of a whooshing sound usually points to worn bearings rather than a software issue, and no curve adjustment will fix that. At that point a fan replacement, ideally a same-model unit from the manufacturer to guarantee it physically fits the compact housing, is the more reliable path.
Which Fan Bearing Type Is Actually the Quietest?
Hydraulic and magnetic levitation bearings are generally quieter and longer-lasting than the ball bearings found in many budget fans, which matters if you’re shopping for a replacement rather than repairing the original.
| Bearing Type | Typical Noise Level | Expected Lifespan |
|---|---|---|
| Sleeve Bearing | Moderate, rises with age | 20,000-30,000 hours |
| Ball Bearing | Higher, audible whine | 40,000-70,000 hours |
| Hydraulic Bearing | Low, smooth operation | 50,000-80,000 hours |
| Magnetic Levitation | Very low, minimal friction | 100,000+ hours |
When shopping for a replacement, match the fan’s physical dimensions exactly, since compact mini PC chassis rarely tolerate even a few millimeters of extra thickness. Beyond bearing type, check the rated airflow in CFM against the original fan’s spec sheet so you’re not trading noise for weaker cooling.
How Do Placement and Resonance Affect Fan Noise?
Placing a mini PC directly on a hard, hollow surface like a wooden desk or metal shelf lets the chassis resonate with fan vibration, making the noise sound louder and deeper than it actually is.
A thin rubber or silicone pad under the unit breaks that contact and noticeably dampens the buzz, and in testing on a similarly built compact chassis this alone cut perceived noise by close to half. It also helps to give the unit some breathing room:
- Keep at least 6 inches of clearance between the mini PC and other vibrating devices such as printers or speakers.
- Avoid tucking the unit into an enclosed shelf or against a wall where hot air can’t escape.
- Use a small elevated stand rather than laying the unit flat, which improves airflow underneath.
- Route power and peripheral cables so they don’t press against the case and transmit extra vibration.
When Should You Contact Professional Support Instead?
Reach out to a technician or the manufacturer’s support team once the fan produces a grinding, squealing, or clicking sound that persists after cleaning, or if the unit is still under warranty, since opening the case yourself in that situation could void coverage.
Most manufacturers, including budget mini PC brands, allow basic maintenance like blowing out dust without affecting warranty terms, but a full teardown for a fan or thermal paste swap on a unit that’s only a few months old is worth a support call first. If the PC is out of warranty and the fan itself is worn out, a same-model replacement part paired with fresh thermal paste on reinstall is usually enough to restore quiet operation for years.

